
I upgraded to Chrome OS 100 because I saw screenshots of a new Windows-like Start menu, but even with the upgrade, nothing’s changed. Do I need to “enable” this new Start menu, and if so, how?
It’s not obvious even to enthused users, but Google is constantly adding new, experimental, and beta features to Chrome OS. Every time you update your Chromebook, something new has shown up, they’re not just security updates! Because most of these features are still being tested, however, Google requires that you manually (e.g., consciously) enable the feature. In other words, you keep updating, but your Chromebook keeps looking the same unless you do something about it.
All the new experimental, prototype, beta, and testing features can be found in the chrome://flags window, so let’s check that out with the new ChromeOS 100 release.
GETTING TO CHROME OS FLAGS AND SETTINGS
First things first, however. Are you running the latest version of Chrome OS? Use this tutorial to force an update: How to Force Update Chrome OS. Once done, go back to Settings > About Chrome OS and you’ll see your current OS version:
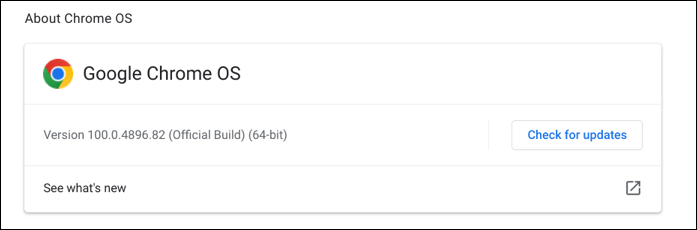
In this instance, I’m now running Version 100.0.4896.82 on this Lenovo Chromebook. Good enough!
Updated, but a click on the lower left and there’s most assuredly not a Start menu of any sort:

So what’s the deal? You have to enable the new Start menu, that’s what!
To do that, open up Chrome and go to chrome://flags and you’ll see lots and lots of “Experiments”:
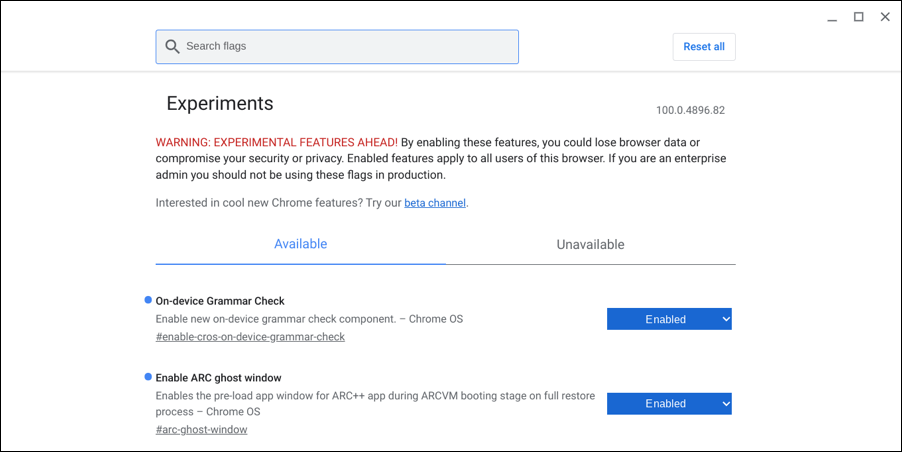
You can see that I’ve already enabled both Grammar Check and ARC ghost window, but there are more. Lots more. To find the flag that controls the new start menu, search for “productivity”:
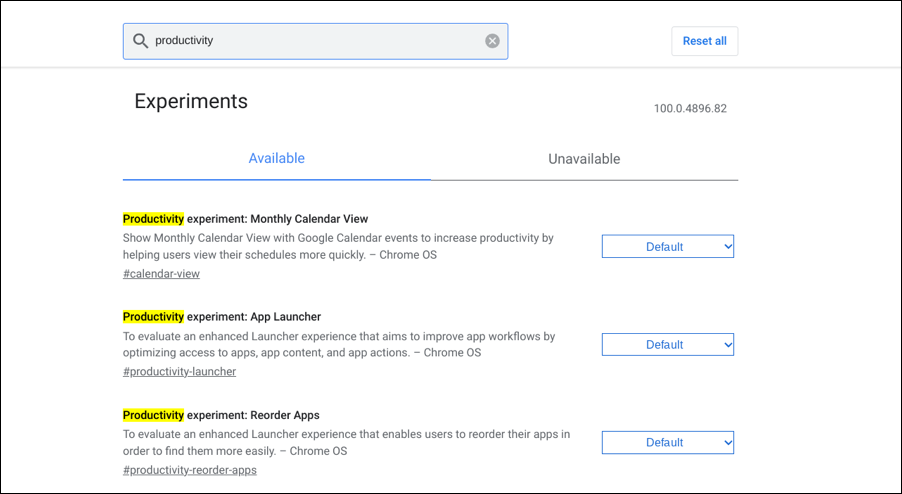
ChromeOS 100 adds a number of “productivity experiments”, as you can see. Let’s start with the Start menu (which, as you can now see, is officially called the “App Launcher” to avoid Windows confusion). We’ll also enable “Monthly Calendar View” momentarily, but let’s stay focused on that App Launcher.
To enable a feature, click on the “Default” choice (which really should be “Disabled” in 90% of situations, but that’s another st0ry):
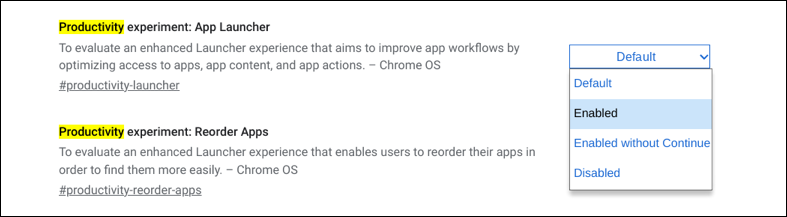
Choose “Enabled”, then you’ll need to restart your Chromebook.
CHROME OS APP LAUNCHER “START MENU”
Restart, log in again as needed, and click on that circle on the lower left circle icon and…
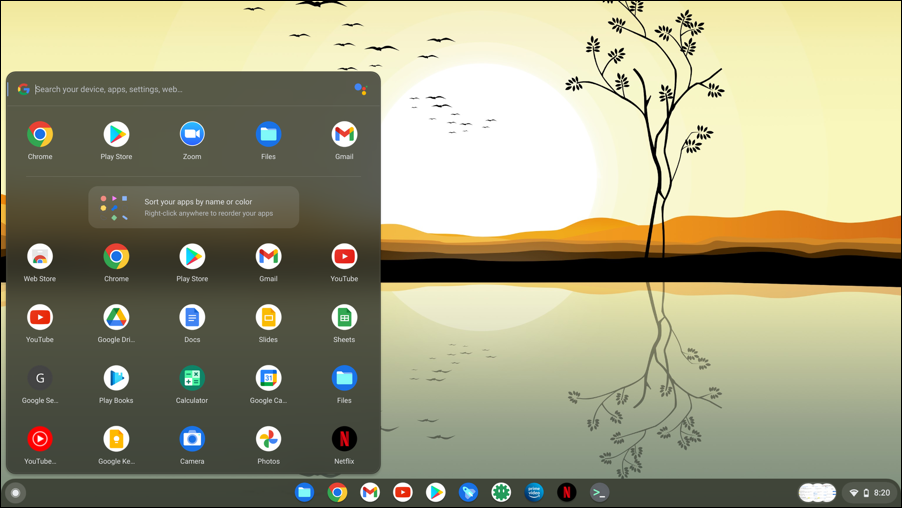
YES! The App Launcher is a huge improvement over the Shelf and its view all apps feature. You can also rearrange app icons, etc, as the pop-up window describes. Don’t miss that there’s a search box on the very top of this new ChromeOS Start Menu App Launcher too!
CHROME OS 100 MONTHLY CALENDAR VIEW
Now we’ve got that fixed up, let’s go back and enable “Productivity experiment: Monthly calendar view”. Before you enable it and restart, note that the lower right of the Shelf is a display of the time, but no date:
![]()
Enable “Monthly calendar view”, however, and that display changes:
![]()
Yes, the date is now shown. Darn useful, in my experience.
But where’s that “monthly view”? Click on the icon tray and instead of going to a pop-up window with various administrative links, you now see…

Yes, your Google Calendar is now accessible directly from the icon tray on the Shelf.
Want to get to the standard shortcuts window? Just click on the “<” on the top left of the calendar view.

4% battery? Yikes! Time to charge this Chromebook!
And that’s it. Now you know how to enable these two excellent new features to enhance your Chromebook experience. Just make sure you’ve updated to Chrome OS 100.x first and you’ll be enjoying the new productivity improvements with just a few clicks (and a restart).
Pro Tip: I’ve been writing about operating systems for many years. You can find a lot more useful tutorials about Chrome OS in my Chrome OS and Chromebook help library here on the site. Why not check it out while you’re visiting?