
I like to look up locations and get directions on my Mac because of its big screen. Once I’ve settled on directions to a destination, is there any way in Apple Maps that I can then send those directions to my iPhone so I don’t have to go through the same steps again? Thanks.
I can remember unfolding printed maps and spending way too much time trying to figure out where I was so I could plan directions to a destination. I learned to drive in Los Angeles, so you can imagine how complex the highway system is there and how critical it was that I knew exact routes so I didn’t end up 50 miles – and two hours of traffic – away from my destination. That’s all changed dramatically with the advent of the high-speed, traffic-smart navigational systems we’ve learned to rely on from MapQuest, Google, Apple, and more. The engineers at those companies, as far as I can tell, all have excellent eyesight and enjoy using their smartphones, however, because so many of the navigational apps seem to be designed to work on device, but not necessarily across the network.
Fortunately, Apple loves to show us how things can work together when you have a full Apple hardware and device ecosystem, so Apple Maps not only lets you share destinations and directions from your Mac to your iPad or iPhone, but it also automatically shows you driving directions on your iPhone – complete with haptic feedback! Let’s go through the process of identifying the optimal route in Apple Maps on my own Mac, then I’ll send those directions to my iPhone.
IDENTIFYING OPTIMAL ROUTE IN APPLE MAPS
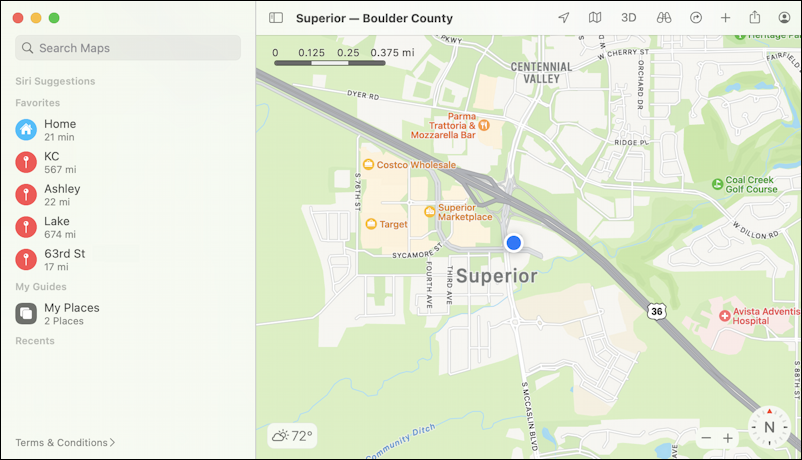
The first step is to open up the Maps app on the Mac and ensure it shows your current location front-and-center:
Now it’s time to start typing in the destination name or address. When I do that, you can see it only takes a few characters before it finds a good match…
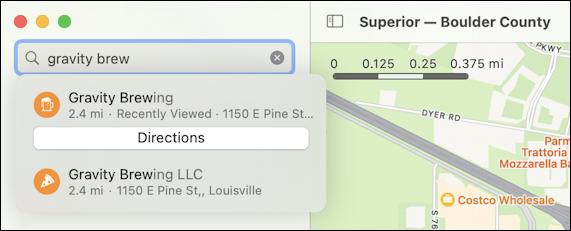
In this case, I’m heading to Gravity Brewing for a beer with friends. It’s only 2.4 miles from my current location, so that’s easy. A click on “Directions“, however, and it offers three routes, not just one:
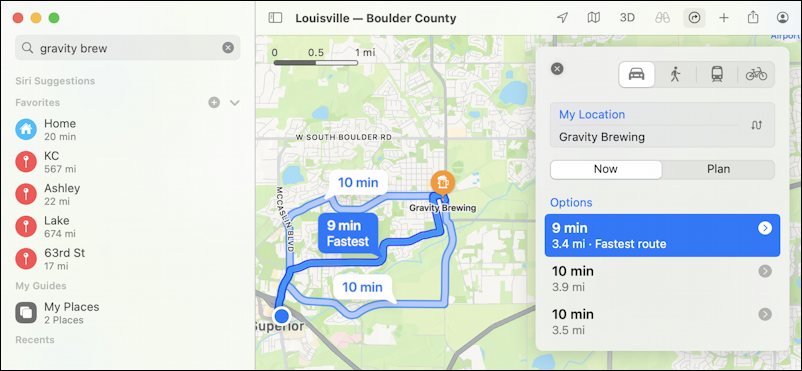
99% of the time I choose the fastest route, which looks like it’s 9 minutes. Easy enough.
A click on the “>” adjacent to the route offers more detail, or I can just click on the route itself to choose it.
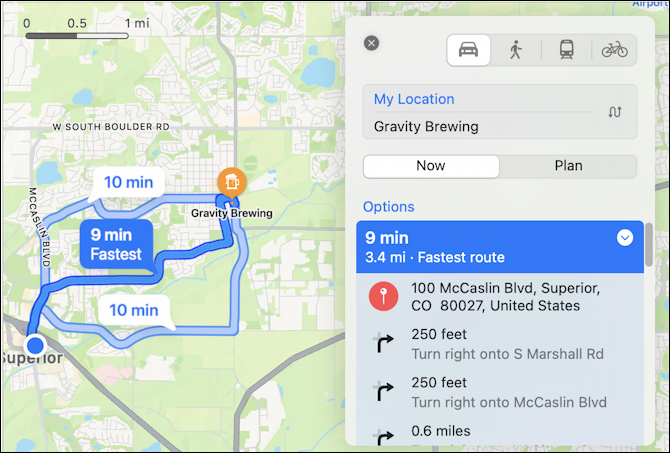
DRIVING ROUTE DISPLAYED IN APPLE MAPS FOR MAC
The route is then displayed, including turn-by-turn information:
That looks great. I’m ready to go! Now I need to send this route to my iPhone.
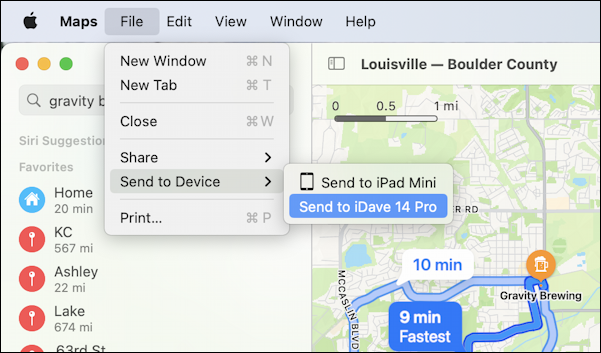
It’s actually pretty easy. Simply choose File > Share to Device > Send to iDave 14 Pro [this will be the name of your connected iPhone, of course, not mine]:
That’s all I have to do on the Mac. Now, on the iPhone…
HOW TO RECEIVE DIRECTIONS ON AN IPHONE FROM A MAC
On the iPhone, simply go into the Maps app and the information will already be shared and ready to go:
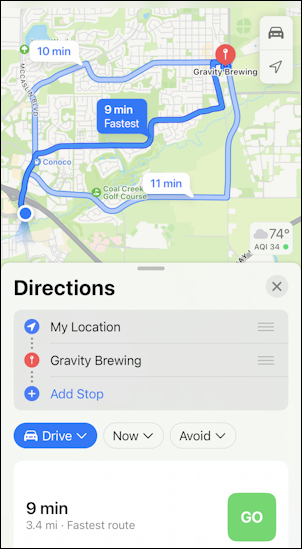
All I have to do is tap on the big green “Go” button and…

That’s it. You can even tap on “Share ETA” and let your friends or family know when you’ll get to your destination. All in all, it’s quite simple and it is unquestionably more convenient to explore routes and destinations on a big Mac screen than a small iPhone screen, even if you have the “Pro Max” model. Now I gotta go, my friends await!
Pro Tip: I’ve been writing about the iPhone and iOS since the very first iPhone was released. I’ve also owned every major iPhone model! Please check out my iPhone help articles while you’re visiting. Thanks!