
I want to share screen shots from my iPhone onto Facebook and find that it’s quite a hassle. Is there some streamlined way to accomplish what should be an easy task? Thanks!
Apple has put a lot of effort into making the screen capture process on their devices easy and powerful, but that doesn’t mean everyone knows all the nuances of the process. Normally on an iPhone you quick-push power and volume down simultaneously and it momentarily flashes the screen to show you that the image has been saved as a photo. A small thumbnail of the image also shows up on the more modern iOS releases to confirm the action and you go to your Camera Roll to access the screenshot, right?
Well, yes and no. The key that I think most people don’t realize is that there’s now a built-in graphics editor that’s part of the screen capture process that you can access with a single tap of your finger. But only at precisely the right time; wait too long and you’re stuck in the Photos editor, which is entirely functional, but doesn’t offer easy annotation and requires that you’ve saved the image. So what’s the scoop? Let’s have a look!
First off, I’m listening to some Julian Lennon today, so here’s what’s on my screen:

A solid album from John Lennon’s son, highly recommended, but that’s another story. For now, I’m just going to simultaneously quick-press power and volume down. It flashes the screen and briefly reveals the thumbnail on the lower left:

Here’s the trick: tap on the thumbnail before it vanishes!
You’ll be dropped into the screenshot annotation editor (Apple calls this “Markup”, if you want the official name) where there are quite a few useful capabilities:

You can try out the various annotation features but I’m going to use my favorite; cropping. Tap and drag any corner of the image and it’ll automatically crop the image as specified. With just a few seconds of tapping and dragging I can get rid of all the player info from iTunes and have just the CD cover and title:

Perfect. Now to share it to Facebook. This is easy too. See the box with the arrow coming out of it in the very top right of the annotation editor? (You can see it two screen captures ago in this tutorial). This share button shows up in a lot of iPhone apps, actually, so keep an eye out for it. For now, however, tap on the share icon and lots of options appear:

Sharing it via text to my friends and family is ridiculously easy, even text groups like Steve & Lamar, and the image can be sent to another Apple device with AirDrop, assigned to a Contact, and much more. But for this task, tap on the Facebook icon…
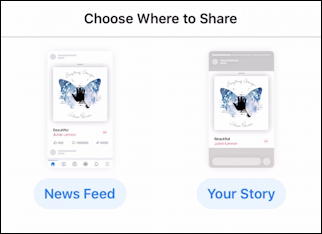
Choose whether you want to share it on your Facebook news feed or your story with a tap, then you can proceed to add text, tags, etc as you’d usually do in Facebook:
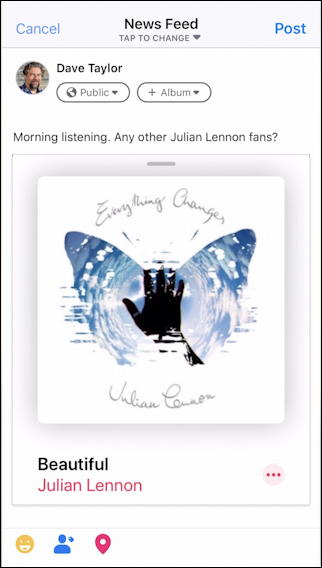
Easy enough to add a caption or note, tag, emoji, location, even change visibility from public to friends if desired. All looks good? Tap on Post on the top right to actually post this on Facebook and if it’s set up properly on your iPhone…

Woot! Done. Well, almost. You’ll be dropped back into the annotation editor, so you’ll want to tap on Done on the top left. You then get one more decision to make:
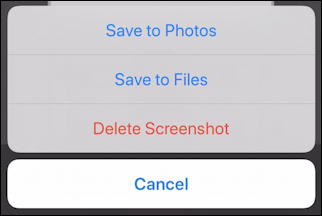
Make your choice, and you’re done. Now you can go over to Facebook and look at your new shared screenshot. Quickly and easily done.
Pro Tip: I’ve been writing about the Apple iPhone since the very first one came out (and yes, I had an iPhone 1!). Please check out my extensive iPhone help area for tons of additional help and tutorials while you’re here!