
I like to save Web pages as PDFs on my computer and then email them to my tablet. Easy. But when the page has lots of images, the pagination drives me crazy. Can I create super long one-page PDFs that I can then just scroll through on my iPad or Mac system?
That’s a really cool question, actually, because it gives us a chance to highlight a little known feature of the Mac OS X system, the ability to create custom paper sizes. Generally this is part of the printer subsystem, as you might expect, but it turns out that since you can easily go into the printer dialog, configure everything exactly how you want, then push out a PDF instead of sending the resultant job to the printer, it’s an easy way to create custom PDF documents too.
I imagine that Windows computers have a similar capability with custom paper sizes, but I haven’t experimented with it in Win7 or Win8 at this point, so cannot say for sure. Microsoft has some information on printer customization in Windows, but it’s not exactly this topic. FYI.
But let’s go back to the Mac. I’m using Mavericks (10.9) but this’ll be the same on most modern versions of Mac OS X because the printer drivers sure haven’t changed much in the last few years!
Start by going to the Web browser of your choice — I use Safari — and choosing Print. The print dialog pops up, looking like this:
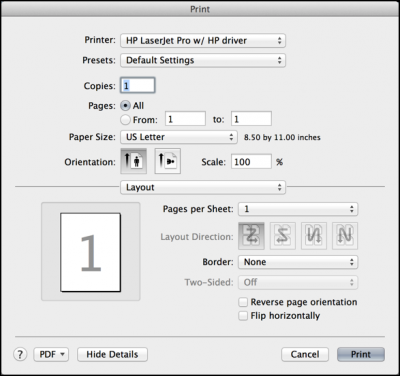
See where it says “Paper Size” and has “US Letter” chosen? That’s the way to access the secret create-your-own-custom-paper-size option. Click on that to pop open the rather surprisingly detailed menu:
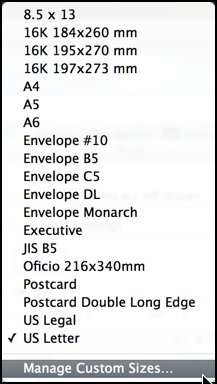
As you may imagine from what I’ve highlighted, choose “Manage Custom Sizes…” at the very bottom.
Before you do, though, marvel at how many different paper sizes there are. Incredible. Talk about lack of standardization!
Once you click “Manage Custom Sizes…” you’ll get an empty window:
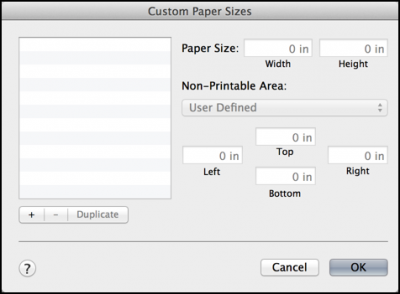
Click on the “+” button to create a new custom size, give it a name and specify a width and height that’s based on the 8.5×11 standard US paper size but is, well, longer. Maybe a lot longer.
I have one set up that’s 300in long:
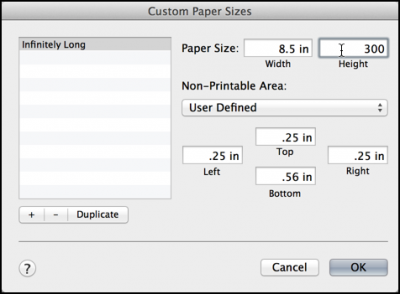
For the record, 300in = 25feet. That’s a really long piece of paper!
You can experiment with different widths to see what matches up well with your viewing on the iPad, I find that 8.5in is standard, but a bit narrow for the purpose of capturing Web pages with wider layouts.
Click “OK” to save the new paper size, and it’ll be chosen as the default size now:
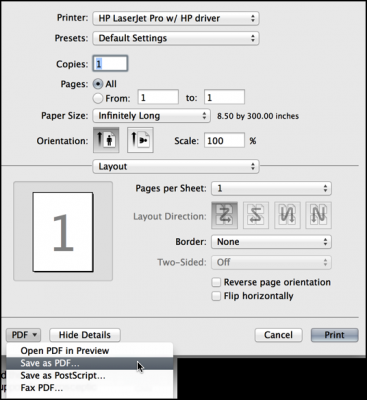
Notice here that I’ve set things up as desired, and am now clicking on the PDF button on the lower left.
That brings up a menu with a bunch of options, but for this, I choose “Save as PDF…”
That brings up — surprise! — another dialog box:
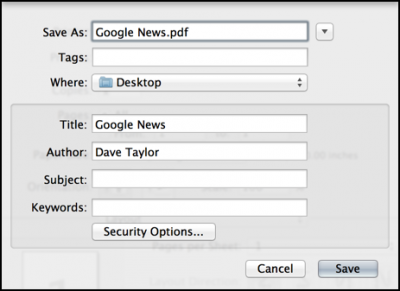
I’m printing, uh, saving, a copy of the Google News home page in this example, which is why I’m naming it this way.
Once I click “Save” the Web page is saved on this 300in long “page”, and can be previewed. Tall and skinny:
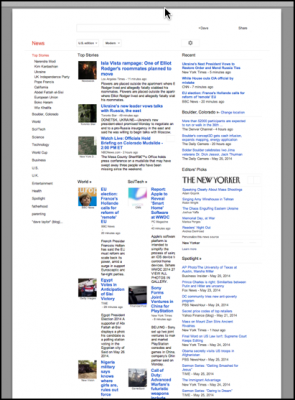
Pretty cool, actually. Here, though, you can see that the page might be too narrow for a good layout, so that 8.5in width could be expanded. Perhaps 12in would work better? Test, test, test.
The only thing to be aware of now that you’ve created and chosen a custom paper size is that the printer driver might be “sticky” with this setting so the next time you go to make a printout, it could default to that size and mess things up. Be alert!
It does really help me out to create my all-in-one-page-long campaign. Big thanks!
So, I’m about 2 years late to this party, but I just found this page/tutorial/discussion through a Google search. It is the ONLY result that addressed my question. Not only that, the answer was clear and concise, and I was able to do it on the first try, easy peasy. THANK YOU!
P.S. I wanted to display email newsletter examples on a blog post, so I saved each email as a PDFs (a super long, one-page PDF), and then converted the PDF to a JPEG. Wouldn’t have been able to do it without your custom page size tip.