
I often come across funny or interesting photos while on my iPhone and share them with friends. But they get to see the entire screen, which can be awkward. Is there some way to crop these photos and images before sharing them?
Earlier generations of iOS, the operating system that’s on your iPhone, had two distinct steps, capturing what’s on the screen and saving it as a photo, then going into Photos to edit and share the image. The most recent versions have integrated it all, so the process is quite a bit easier. I know, I use it at least once every single day when I bump into an image or meme that I want to share with friends or family!
The actual sequence for taking a screenshot on an iPhone is slightly different depending on what model you have [see: How to take a screenshot on your iPhone], but on my iPhone 13 Pro it is a simultaneous push on volume up + power (the buttons on either side of the screen). You’ll know it worked because not only does the screen turn white momentarily, but you see a tiny thumbnail. Ah, but I get ahead of myself. Let’s have a demo, shall we?
HOW TO CROP AN IPHONE SCREENSHOT
I jumped over to Facebook for this demo and found my friend Doug was sharing photos of his new Chevy Camaro. Very nice!
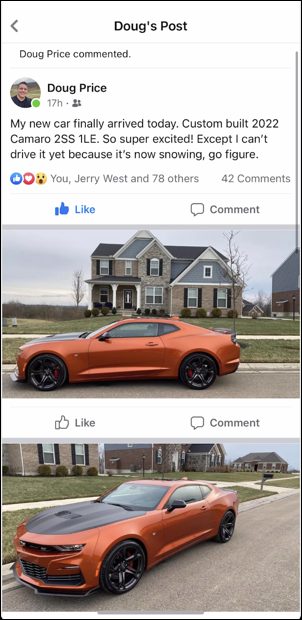
Since my son’s a car nut, I thought I’d share an image with him to see what he thinks. The lower one is my favorite of these two, so I’ll take a screenshot with the volume up + power buttons. It confirms it worked by showing a tiny thumbnail on the lower left:
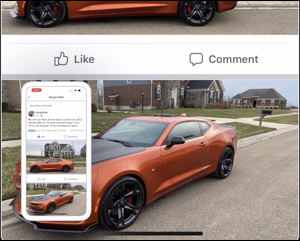
Here’s the secret to getting this all to work: tap on the thumbnail before it vanishes!
Now you’ll be in the photo editor:

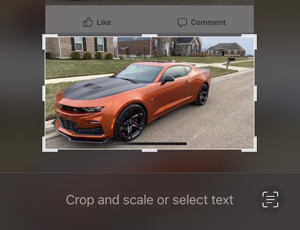
Quite helpfully, it’s already in cropping mode by default, so just tap and drag any of the thicker spots on the frame around the image. As you go, it’ll change what’s highlighted and what’s greyed out. Feel free to lift up your finger to see how it looks, then tap and drag further to fine tune the crop.
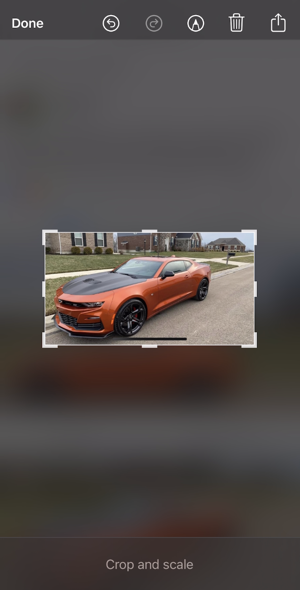
Once you’re happy with the results, lift your finger and wait just a few seconds. The cropped part will snap to the center, zooming in as needed:
Now it’s time to share the cropped image!
HOW TO SHARE AN IMAGE ON THE IPHONE
All sharing is done through the box-with-an-arrow-sticking-up icon on the top right. Tap on it and a world of options appear:
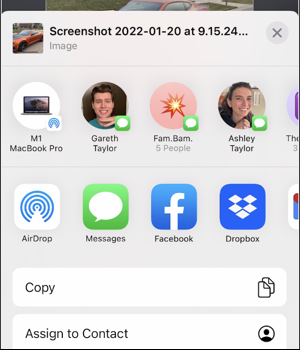
The top row is AirDrop sharing with my M1 MacBook Pro laptop (handy!) and the most recent recipients of text messages in Messages. The second row are apps, again with AirDrop, then Messages, Facebook (I could share the Facebook photo back to Facebook!), Dropbox, and so on. Below that are a lot of other options including assigning the image to contacts, using it as screen wallpaper, and lots more.
For this task, however, I want to share the photo with Gareth. A tap on his picture and I’m dropped into Messages with the image already loaded up:
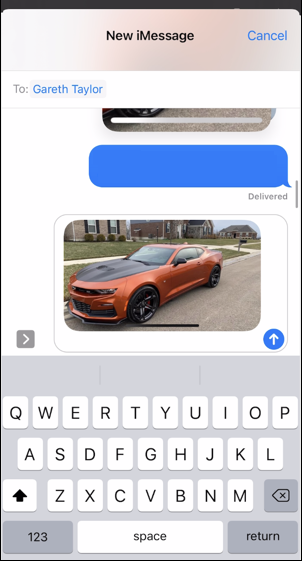
You can just tap on the send button, but why not actually add some text to explain what’s going on?

I’m ready to send it with a tap. Sent. Done.
Now back to the photo editing view, you can tap “Done“, at which point you get these choices:

Since I’ve sent the image, I always tap “Delete Screenshot” so I don’t clutter up my photo albums, but, as you can see, you can opt to save the cropped image as a photo or file, depending on which you tap.
And that’s it. Now you know how to take a screenshot, crop it, and share it with friends or family!
Pro Tip: I’ve been writing about the iPhone and iOS since the very first iPhone was released. Yes, I’ve owned every major iPhone model! I’ve also written quite a few iPhone help articles on a wide variety of topics, so please check ’em out while you’re visiting. Thanks!
Dave,
Would you please demonstrate how to do a split-screen Word editing session on an iPad Pro with iPadios15. I’ especially interested in cut/paste and drag/drop.
Thanks in advance,
Jim Transue