
I saw on your Dad blog that you have a “Message @DaveTaylor” button on every page. Very cool. How can I create one just like it?
First off, thanks for checking out my GoFatherhood site! It’s somewhat of a labor of love, writing about raising teens and my adventures when I’m not testing and reviewing consumer electronics, so it’s always good to hear from a reader!
Twitter has had a button builder for a while but it only just added the ability to create a button for your Web page or blog that launches a private or “direct message” contact through your Twitter account. It’s very nice because it’s a private one-to-one communication quite similar to texting, but without them needing to know your cellphone number.
Unfortunately, it’s a bit of a bear to set up, so this is going to be rather a longish tutorial. But you can do it! To start, you’ll want to go to publish.twitter.com. You can click or you can type it in, either way, you’ll end up looking at this very, well, purple screen:

You can check out all the other options, but for this task, you’ll want to click on “Twitter Buttons” on the right side. You’ll then see quite a few different types of buttons from which to choose:
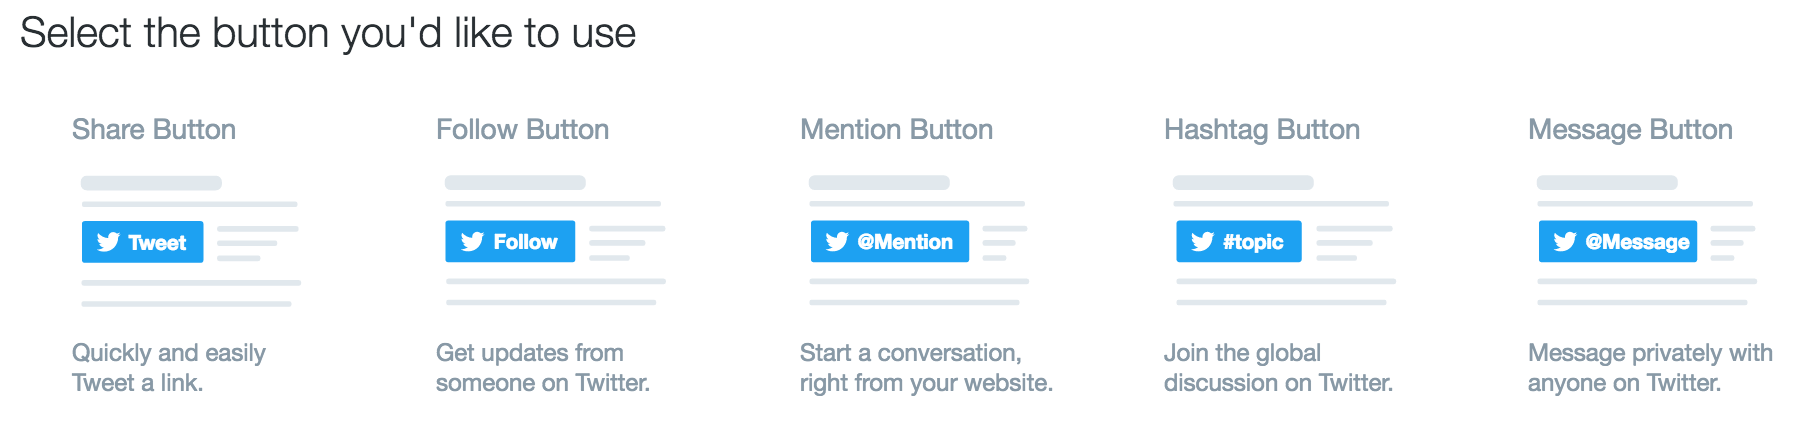
As you can see, Twitter calls this a “Message Button“, and that’s the one you want to choose. A click and you’re ready to enter some values and generate the embed code.
Sort of.
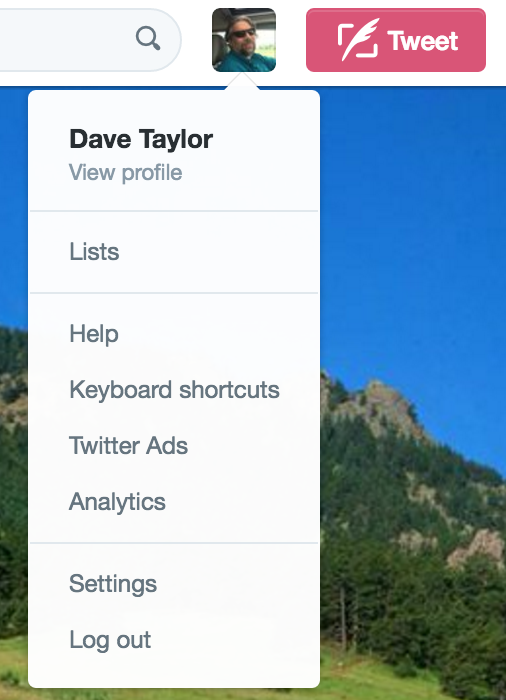
The tricky part is figuring out your Twitter user ID. But we can do that too, just open up another tab in your Web browser and go to your Twitter home page. For me, it’d be http://www.twitter.com/DaveTaylor since I’m @DaveTaylor on Twitter. On that page, you’ll want to choose “Settings” from the menu on the top right:
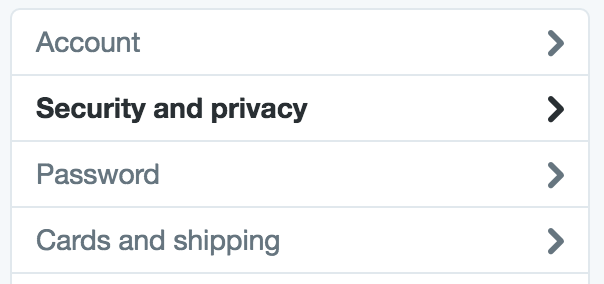
You can see it near the bottom of the list. Now there are two tasks required here. First, let’s make sure you have things configured so that you can get direct messages from people you aren’t already following on Twitter (a necessity for the button to be useful). To do that, look down the list of options on the left side and choose “Security and privacy“:
The right side of the screen changes to show all of those many, many options. Well worth perusing to ensure that you have everything set up as you desire, but right now just scroll to the bottom and ensure that the following option is checked:

Save the change if you didn’t have it checked, then on the left side look for “Your Twitter data“:

This time what you seek is right at the top, your numeric user ID:

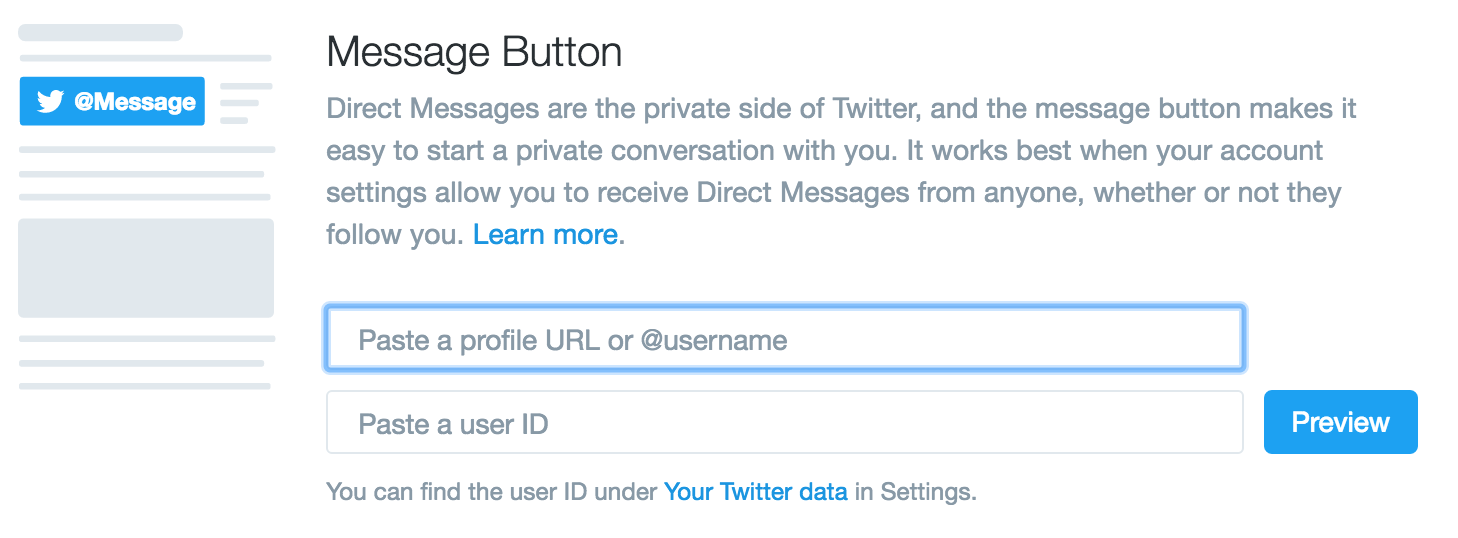
There we go! My Twitter user ID is 973392. I also know my Twitter account name — @DaveTaylor — so I’m ready to add this button to my page. Go back to the other tab where the button builder is patiently waiting for the requisite information and fill ’em in:

Now it says “Preview” but in fact, that’s also the “generate code” button, so click on it and you’ll be shown the exact code you need to copy and paste onto your page:
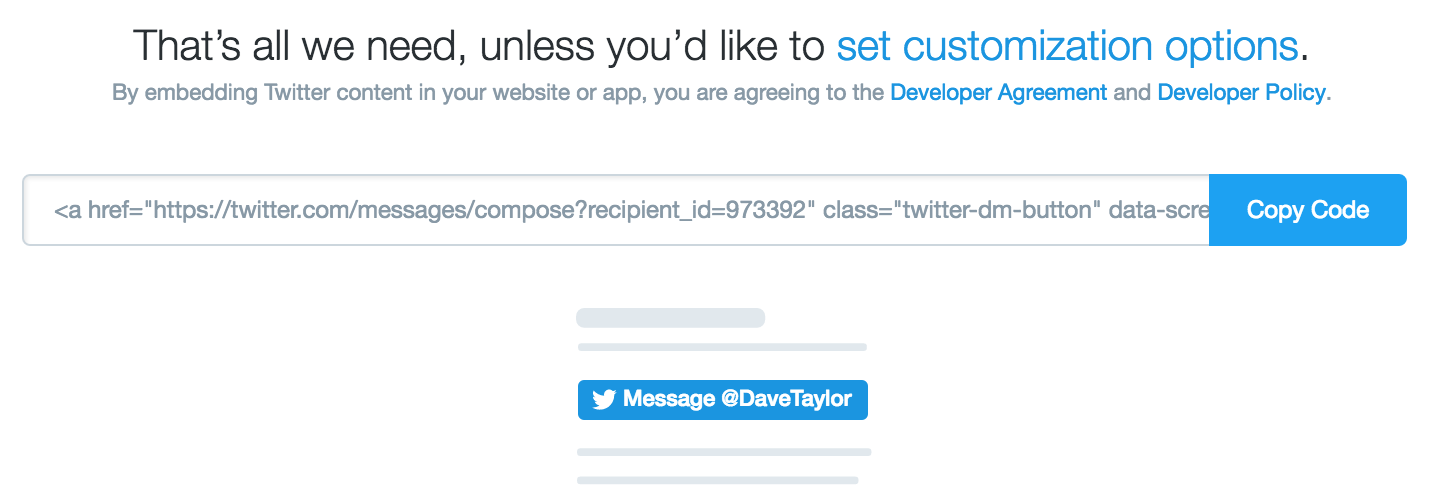
It’s easy enough, click on “Copy Code” and find the “raw” or “text” or “html” input for the page you want to embed the button, figure out exactly where you want the code, and paste it. Save, reload the destination page and you’ll have a neat button like I have here:

That’s it. Not monstrously difficult but definite quite a few steps. Want to try out the code? Go to my dad blog and click on the button to send me a direct message on Twitter!
(or you can follow me on Twitter instead. Just visit @DaveTaylor and click ‘follow’)