
I need to share some video files with a client, but they don’t want unencrypted files online. We’re using Dropbox, but I don’t see any way to encrypt the files?
Your client is right to be skeptical of the encryption used on Dropbox. Security experts aren’t impressed, and I know that if you upload a file with a “hash” analysis that matches a file that was removed for copyright violations it can be rejected by the Dropbox server. All of those can add up to a service that offers good security and much convenience, but possibly not sufficient security for truly private or secret content or enterprise work.
Which leads to the question: how do you create an encrypted, secure ZIP archive file on a Mac system? Turns out that it’s straightforward, but you have to be willing to get your hands just a bit dirty with a command line sequence. Don’t panic, I’ll show you exactly what to type in and it’s definitely something you can handle.
Bonus: If you’re worried about DMCA filters on Dropbox, encrypting the file with your own password should sidestep the issue, though I still discourage you from sharing files that you don’t have the legal right to share, of course.
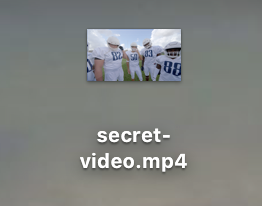
Now, to start, here’s a video file ready to share with a client:
To create an encrypted archive file version of this video file, in the cross-platform friendly ZIP Archive format, open up the Terminal app (you can find it in Applications > Utilities) and type in exactly:
zip -e secret-video.zip secret-video.mp4
In this example, the input file to be included in the archive is “secret-video.mp4” (as shown earlier) and the resultant output encrypted ZIP archive file is “secret-video.zip” in the same folder. Note the “-e” flag that tells the zip program to prompt for an encryption password.
Type it in, with your own input and output file names specified (tip: you can specify as many files at the end of the command as you want, so if you have a folder full of .mp3 audio files, for example, you could use “*.mp3”) and zip will prompt you for the desired password. Enter it twice, and it’ll build the file, encrypting it as it goes:
Enter password:
Verify password:
adding: secret-video.mp4 (deflated 0%)
$
Now you can move back to the Finder as your command line job is done. Phew!
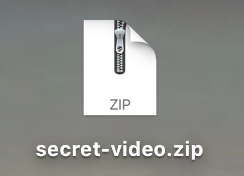
The resultant output ZIP file shows up as you’d hope:
Interestingly, the MacOS X system doesn’t show a special icon to denote it’s encrypted. Let’s just double click to open it, just to make sure…
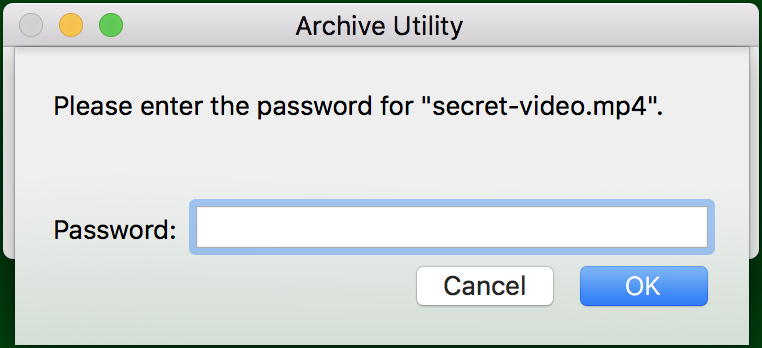
That works as you’d desire. Enter the wrong password and you can’t proceed. Enter the correct one, however, and it unpacks and the original video shows back up again!
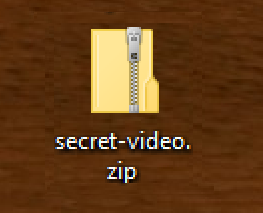
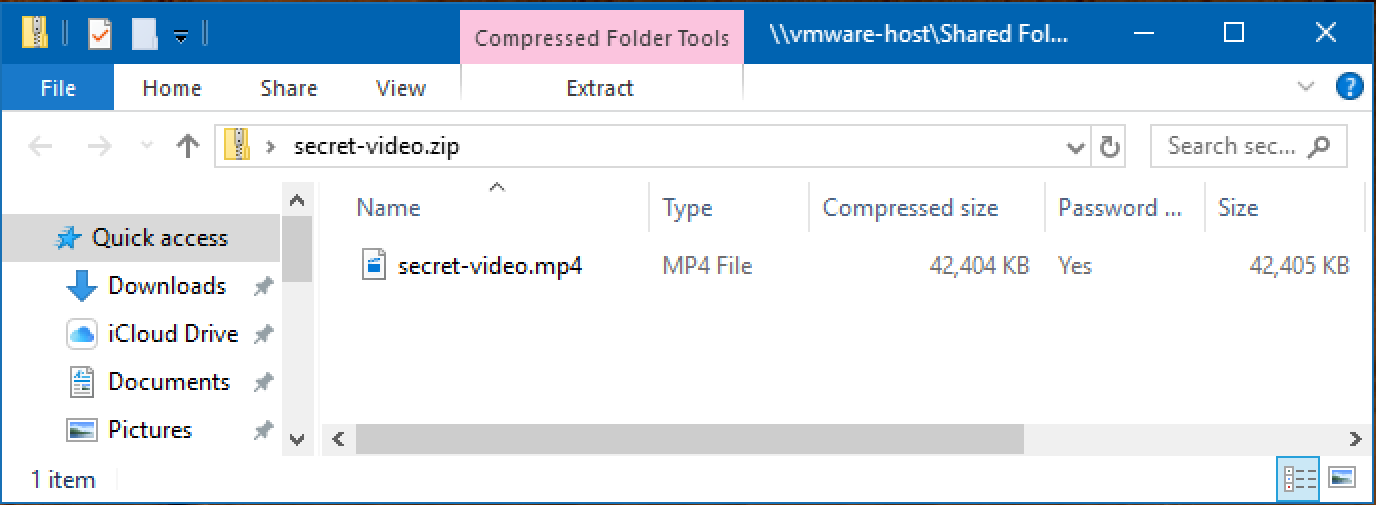
Switch the same archive file over to a Windows 10 system and it also fails to get a special icon to denote it’s encrypted:
A double-click to open it and you’ll see what’s inside:
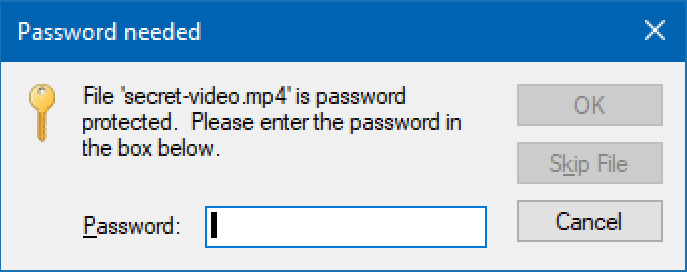
Double click that to actually try and view the movie and you’ll again be prompted for the proper password:
That’s it. A simple command line invocation and you have a secure file you can store on Dropbox and that only your client – or whomever else you share your password – can unpack and view.
Thanks for the usefull and correct info. I have checked other pages before and there it was not the case… so thanks again to you.