
Hey Dave, I’m stumped. How do I get photos from my iPhone onto my Windows computer? I’m running Windows 10 and have an iPhone 7.
While the tech companies like to tell us that they keep the customer’s needs foremost, there are some pairings that are good, and others that aren’t so good. Android and a Mac, for example, is an inferior experience than Android and Windows. Similarly, if you’re using Apple mobile devices but a Microsoft laptop or desktop, it’s not going to be quite as smooth, even if you’ve downloaded iTunes onto your Win10 PC to try and make things easy.
The good news is that while Apple’s official answer might be that you should just buy yourself a Macintosh computer, the reality is that your iPhone and iPad both can act as a regular USB camera for photo programs on Windows. Not only that, but Windows 10 includes Microsoft Photos, which does a very good job of importing and analyzing photographs and videos from any device.
In fact, that’s what Apple recommends too: Microsoft Photos and a simple USB cable. So let’s have a look! Start out simply by searching for “Photos” with Cortana on the Task Bar:

The highlighted program is what you want and it should be installed as part of the default software on Windows 10. Launch it and if you have photos on your computer already, they might well show up magically in the program:

Before we take the next step, it’s time to plug in your Apple iPhone and unlock it. It can then show up on the Windows desktop, probably with an alert similar to:
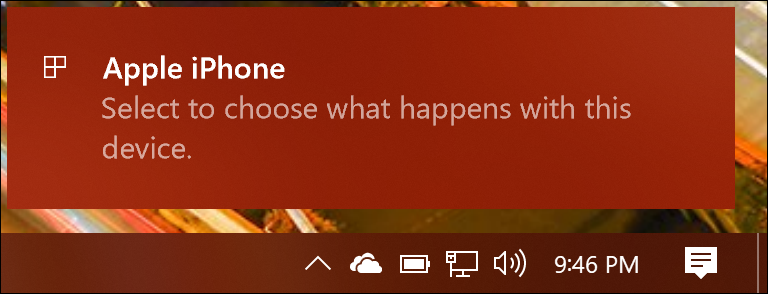
You want to click on that little window, so do so before it vanishes (for reasons I can’t explain, it’s only on screen for a few seconds). Once you do, on the top right you’ll get a bunch of choices in yet another window:

Notice you can choose to automatically import photos and videos into Photos, but you can also backup everything to OneDrive if you’d prefer. Cloud backup of all your important photos? That’s a good idea (and one you could do with Apple’s iCloud service too, for that matter).
Since we’re using Photos directly, I suggest that you choose “Take no action” so it shows up as a device, but no programs are automatically launched.
Now you can switch back to Photos. On the top right is an Import button. Click it.
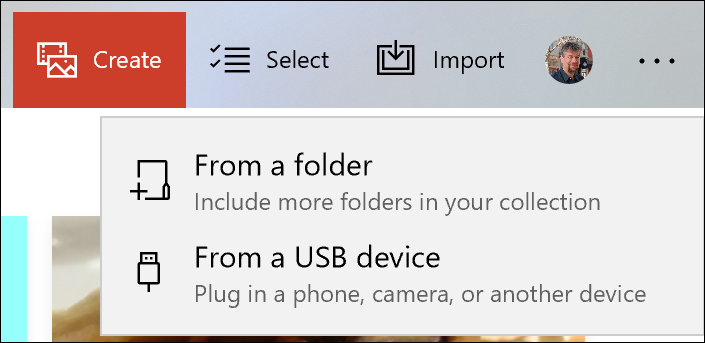
There are two choices, as you can see: Import from a folder or import from a USB device. It’s the second that you want to choose, so click on “From a USB device” in Photos to proceed.
Now it’ll begin to analyze and scan all the photographs and videos on your iPhone. It might show you something like this, but don’t panic:

No previews? Like I said, don’t worry. Click the cancel button (not in the above image) and give it a few more seconds to finish scanning and eventually the window should look like this when you Import > From a USB device:

By default you select all, which is a convenient way to grab every single photo and video from the iPhone. In my case, however, 1,761 image files is rather more than I’m interested in importing, so I’ll instead click on “Unselect all” then go through and select the picture or pictures I desire. Once I’m done, a click on “Import selected” does the work and the images are copied to my Windows PC and show up ready to view, edit and share:

And that’s all there is to it. Photos is your friend with the Apple iPhone and your Windows computer. As a bonus, it’s a smart program that’s well designed and easy to use. What’s not to like?
Pro Tip: While you’re here, I invite you to check out the extensive Windows PC help area with hundreds of other handy tutorials and how-to articles.