
Now that I have a new iPhone 5 – which is totally sweet! – I’m trying to figure out how to take some of these much discussed panoramic pictures, but I can’t find an app or a way to switch the camera app to go into panoramic mode. It’s iOS 6, of course, but what’s the secret? How do I take a panorama with my new iPhone?
Congrats on the new iPhone 5. Among other cool features, it’s got one heck of a sweet camera built into it, with one heck of an 8 megapixel resolution and fast f/2.4 aperture. Then again, that’s the same camera that’s built into the iPhone 4s too (though the iPhone 4 only has a 5 megapixel camera with an f/2.8 camera) so those of us with a 4s have been enjoying the surprisingly good output of this camera for quite a while now.
Turns out that because it’s the same camera, both the iPhone 4s and the iPhone 5 now have panoramic capabilities with the latest version of the iPhone OS, iOS 6. Load that on your device and I’ll demonstrate how to take a panorama. It’s easy.
Got an iPhone that’s older than the 4s? Then you won’t be able to take these panoramas, unfortunately. Just not an option with the earlier hardware. A good excuse to upgrade to the gorgeous new iPhone 5, right? 🙂
Once you’re ready, here’s what’s involved. First off, tap on the “Camera” app. Here’s a typical view:
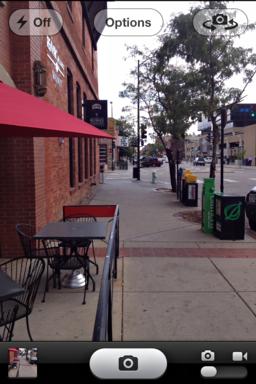
As any iPhone photographer already knows, it’s worth paying attention to the various buttons rather than immediately focus on the image. Left to right, on the top, are the flash controls (ON, AUTO and OFF), the Options button and the camera selection button that lets you flip between front view and rear view camera.
It’s under Options that we find the Panorama feature. Tap on it.
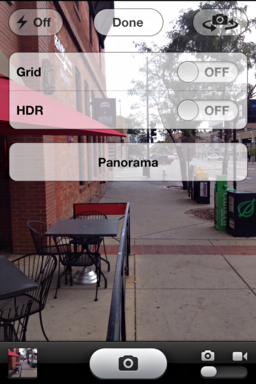
Grid lets you add a handy set of lines across the camera view screen so you can ensure that you’re level and square, and HDR is “high dynamic range”, a way of taking a photo that’s slightly underexposed and another that is slightly overexposed and automatically merges them for the optimal photograph. Takes some practice, but it’s quite cool.
What you want, however, is “Panorama”. Tap on it.
Now here’s the only spot where it’s confusing because it’ll show you the view of how to start taking a panoramic photo, but you’re not actually taking it yet:

To actually take the photo, tap on the “take photo” button on the bottom, as if you were taking a normal photo. Then follow the instructions, slowly turning towards your right as you hold the camera as level as you can…
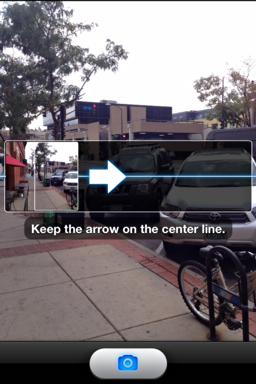
If you move too fast, it’ll warn you:

When you’re done, it’ll show you the panorama for just a second while it processes the multiple photos it’s stitching together…
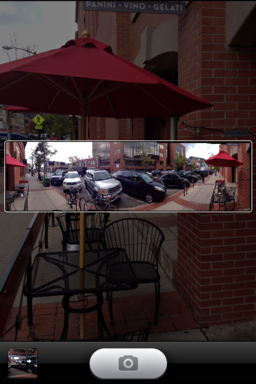
Then it’s done and in your Photo Album you have a picture that looks super tiny until you look more closely at it, as shown here:

Quite easy, once you know the trick. Now, let’s see what you can do with it!