
Now that I have a new Android smartphone I want to have all my photos automatically uploaded to my Dropbox account so that I never lose any. How do I set that up?
Congrats on your new smartphone. Nice to have a new device and I applaud you for thinking through how to make sure you don’t have any problems with your data. Google services definitely make your Android system work well, so you definitely want to log in to your Google account and enable all the data sync and backup services. In fact, you could back up your photos to your Google account too, but I’m also a fan of Dropbox and in particular find it a good solution for my cross-platform, multi-OS world.
Even better, you can set up automatic uploading of photos and videos from just about any device, from an Apple iPad to an Galaxy Tab E tablet. Easy enough.
Don’t have Dropbox yet? Sign up today and you can get started immediately. Oh, and in any case, you’ll need to download the Dropbox app from the Google Play store. Here’s a shortcut: Get Dropbox for Android.
Now find the icon on your phone, which is definitely the easy part:

Tap on it to launch it, make sure you’re logged in to your shiny new Dropbox account (or your existing account, of course), and you’ll be looking at either the photos you’ve recently uploaded – as I show below – or a similar screen without any uploads yet:

Take note of the section that shows “7 files” uploaded today, but what you want to tap on is the three-horizontal-lines button on the top left. That will bring up the main menu for the Dropbox app:

Still not what you want, though. See the gear icon on the top right? That’s the lucky charm. Tap on it.
You’ll launch the rather extensive settings and preferences menu:

Still not what you seek – which is why having a tutorial is handy, eh? – so swipe to go down.
Finally, you’ll see the option you seek:
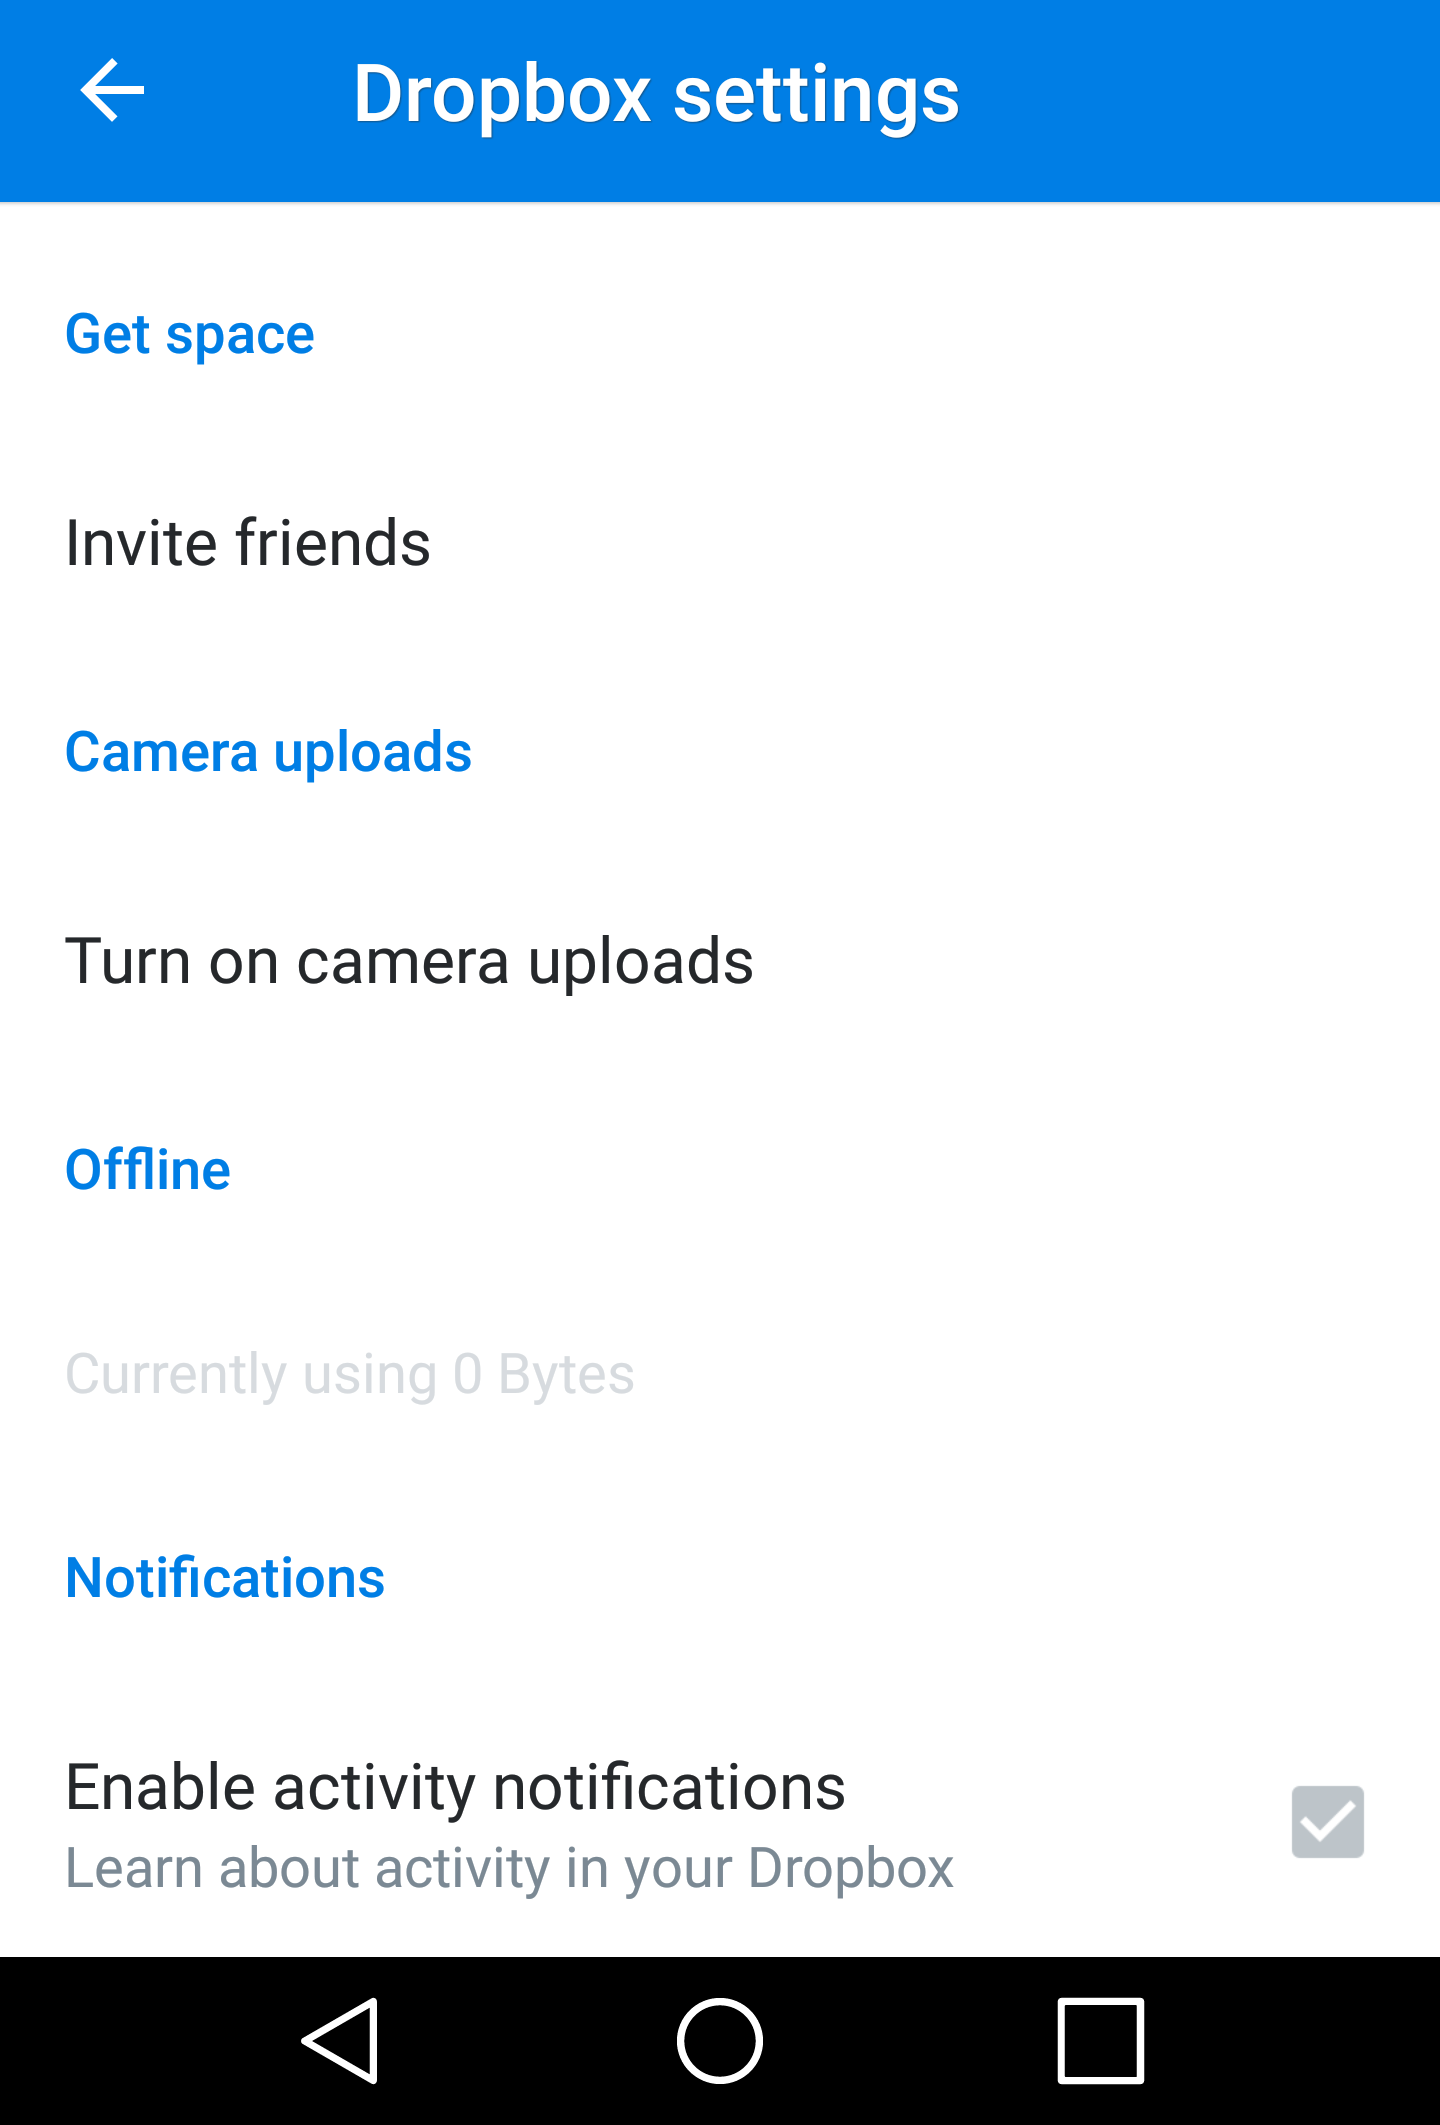
The way the Dropbox team has designed the interface is a bit peculiar, but you’ll want to tap on the words “Turn on camera uploads” to enable the feature. I would rather see actual on/off buttons or similar, but that’s how it is. Once you’ve tapped the words, a few new options suddenly open up below it:

You can change the default settings by simply tapping on the line, so, for example, tapping on What to upload offers two choices:
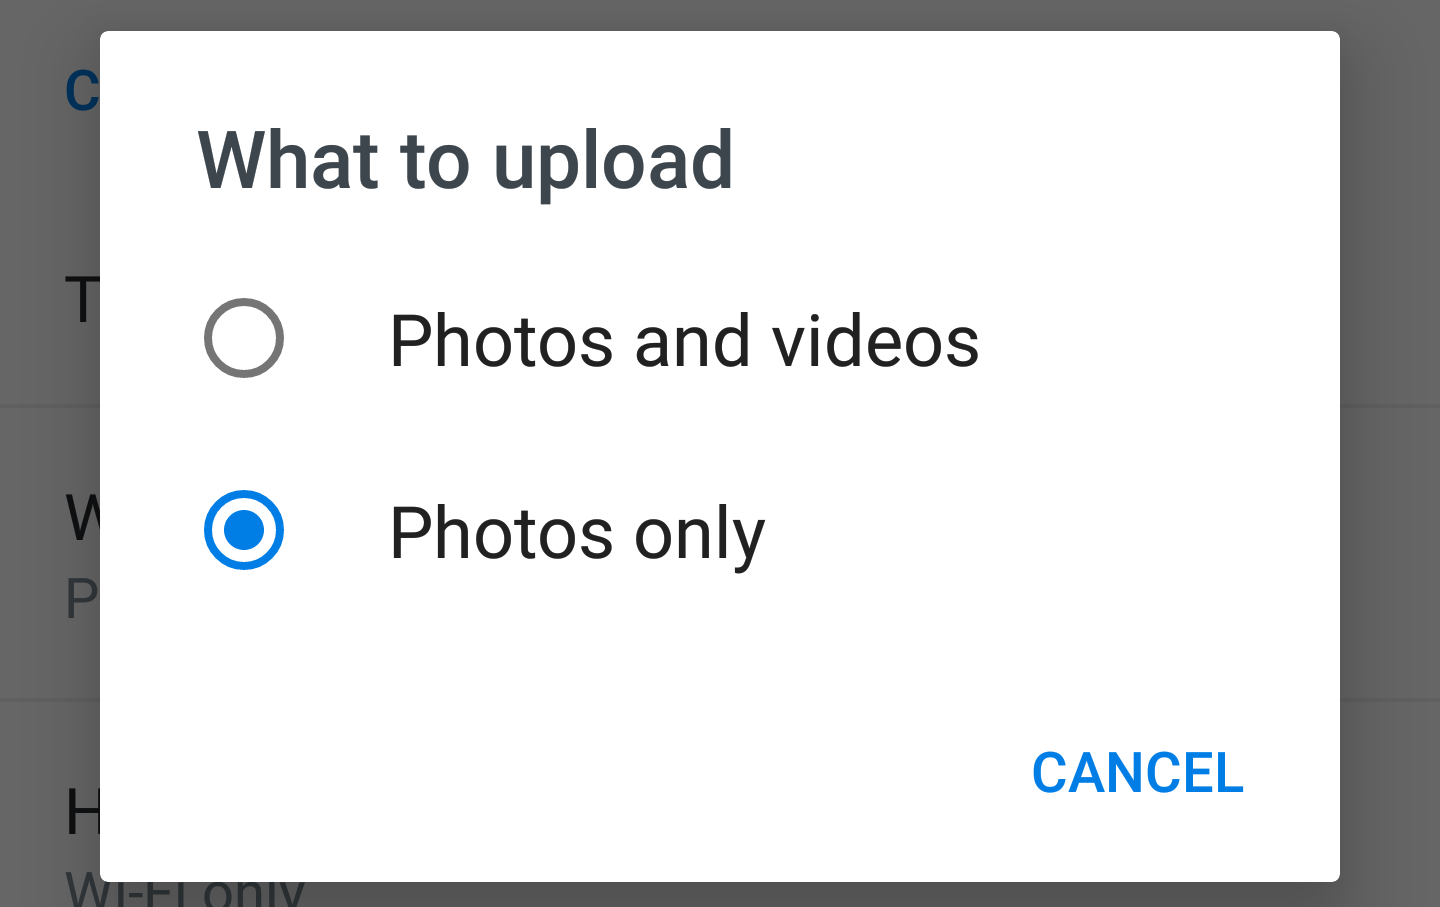
Careful if you choose videos and photos: video files can be quite large and eat up a lot of storage space. Then again, it’s nice to have them archived!
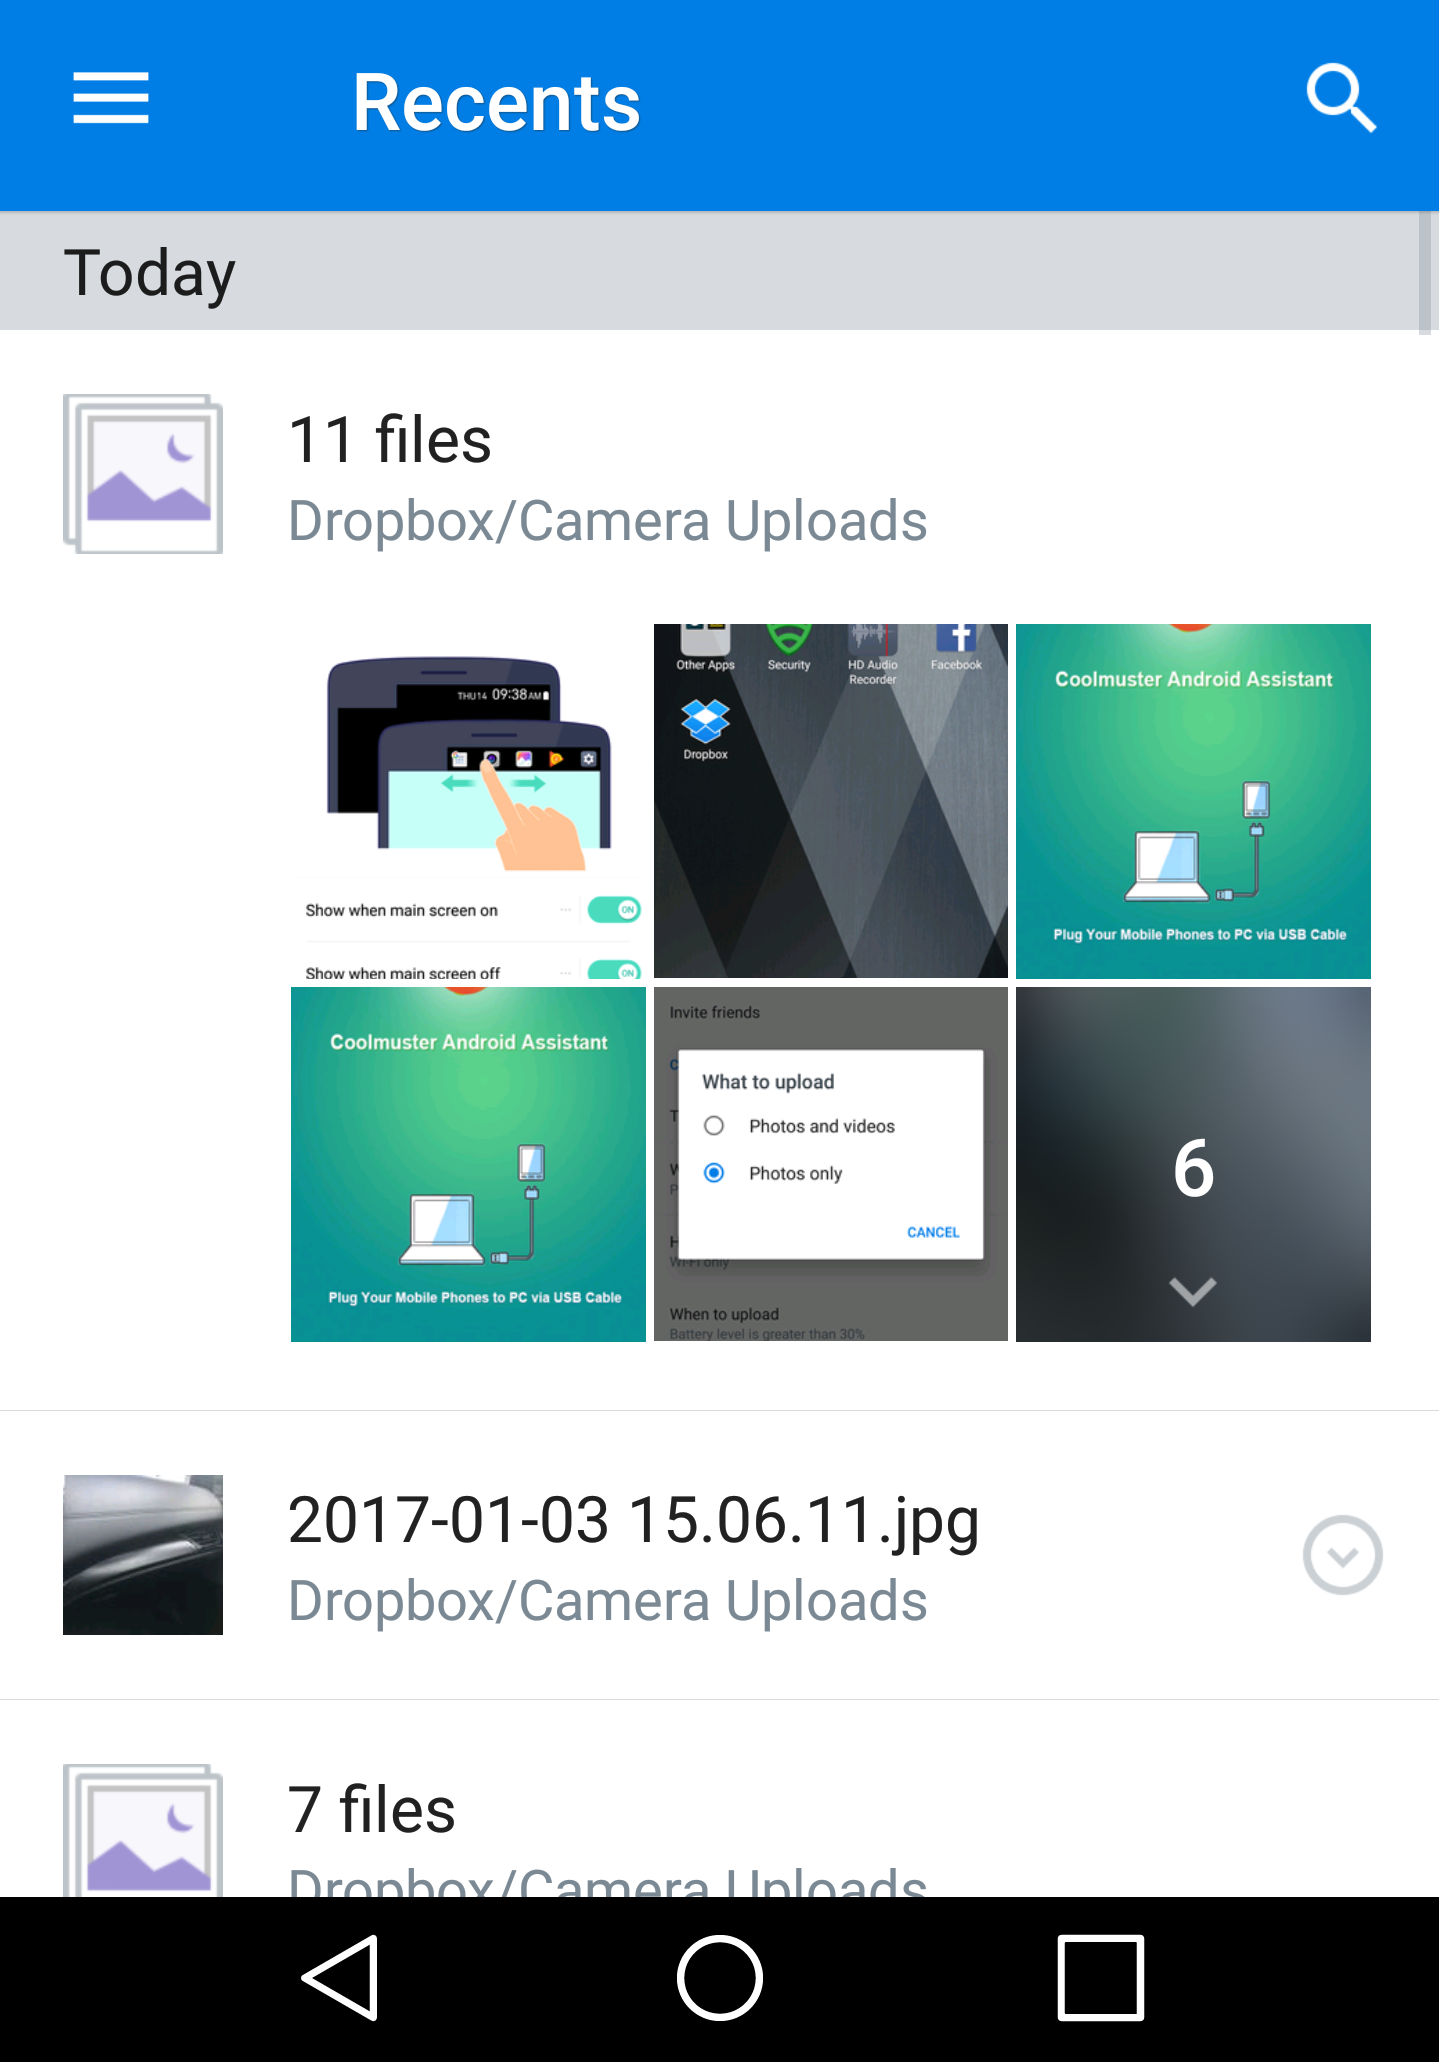
Choose the settings you want and tap on the back arrow (left triangle on the bottom) and you’re done. In fact, while you were looking at the settings, Dropbox was probably already uploading photos, as you can see below: the files uploaded for today has jumped from 7 in the first screen capture to 11 here:
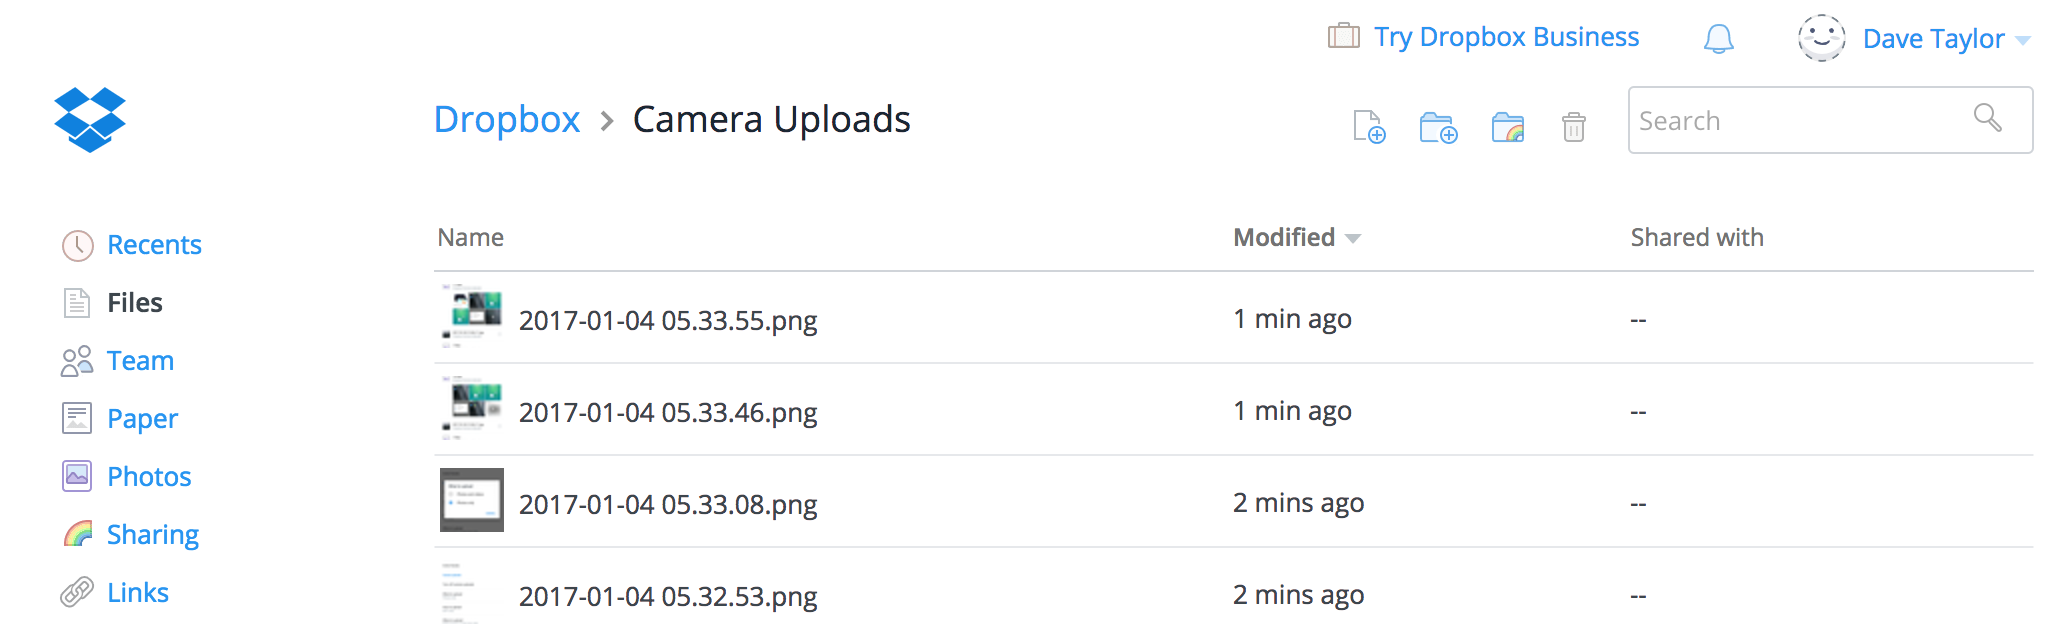
That’s it. Want to double check it works? You can pop over to the Web interface for Dropbox and the files uploaded will be shown as the most recent:
That’s it. Mission accomplished. And now whenever you’re on a wifi network, just occasionally remember to tap the Dropbox icon to launch the app and it’ll automatically make sure everything’s uploaded to the Dropbox server. Ah, life in the cloud ain’t too bad!